
Sisu - Timeline for your studies
This function can only be used starting in August 2026.
Scheduling your study plan in Timeline –page is intended to support students in planning their studies and understanding the overall structure. Scheduling the study plan is not mandatory, it functions as a tool to assist the student.
In Sisu, studies can be scheduled either independently or by Schedule courses with a Timing template. Both options are explained below:
- Scheduling courses
On the Timeline –page in the top bar of Sisu, you can plan your studies across the intended duration of your degree. By default, the Timeline –page displays the study plan selected on the Structure of studies -page. You can also change the study plan used for scheduling directly from the top of the Timeline –page via the dropdown menu next to the study plan name. The scheduling tool includes only those courses and any study drafts that have been selected for the study plan on the Structure of studies -page.
In the Timeline -page, you can plan how your studies will be distributed across the entire duration of your degree. Teachers can see the scheduling plans of the students they supervise. Studies are scheduled by period, and each period has a Schedule a courses -button, which opens a window for planning your studies.
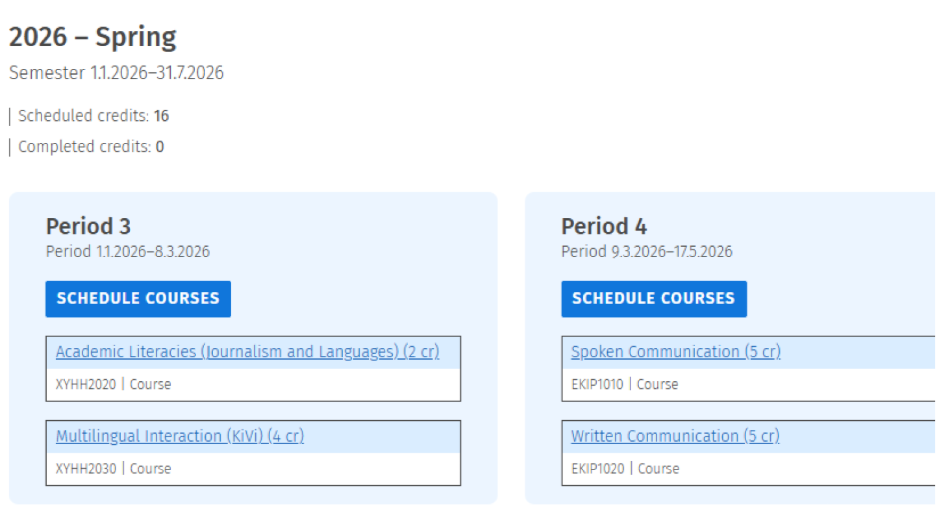
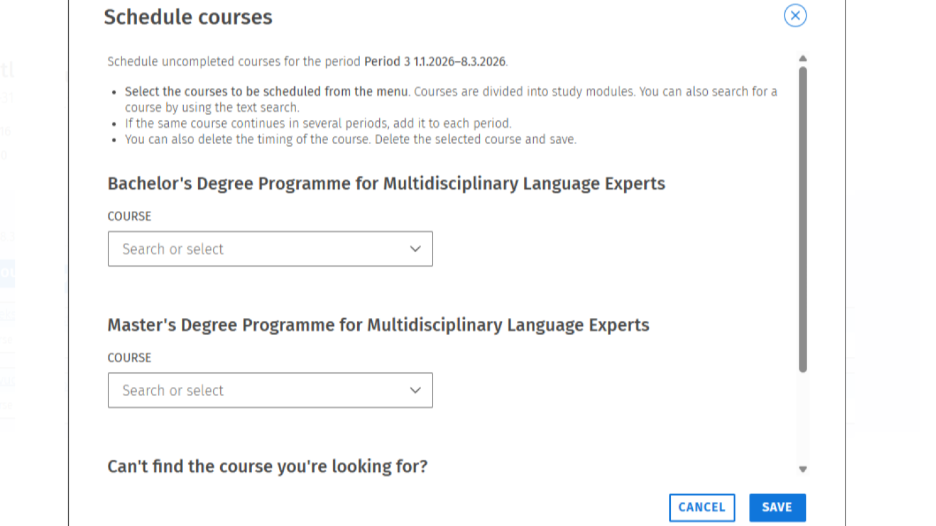
In the scheduling courses search, all uncompleted courses and study drafts included in the study plan are displayed. The courses are grouped under the modules defined in the study plan and are shown in the same order as in the study plan.
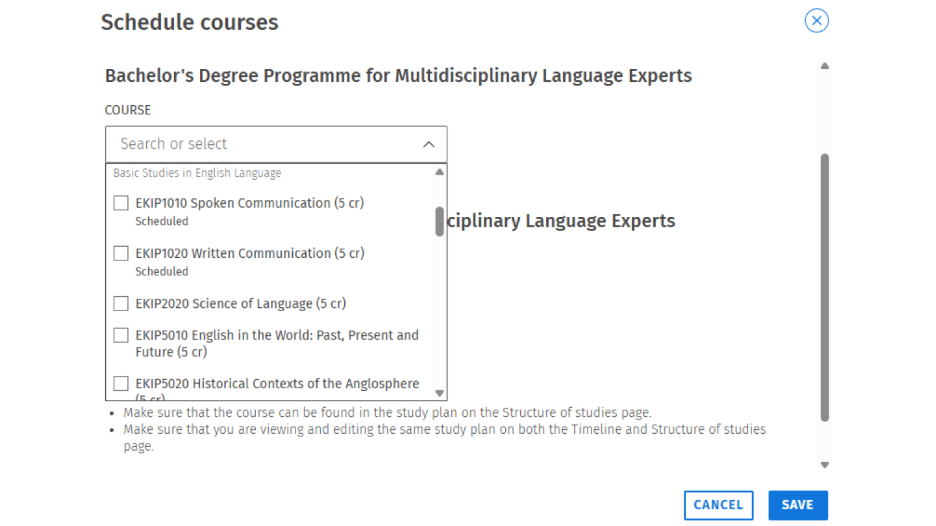
In the search view, the courses selected for scheduling in the given period, as well as the courses that have already been scheduled for the same period, are displayed. If needed, this can be undone by removing the checkmark next to the course.
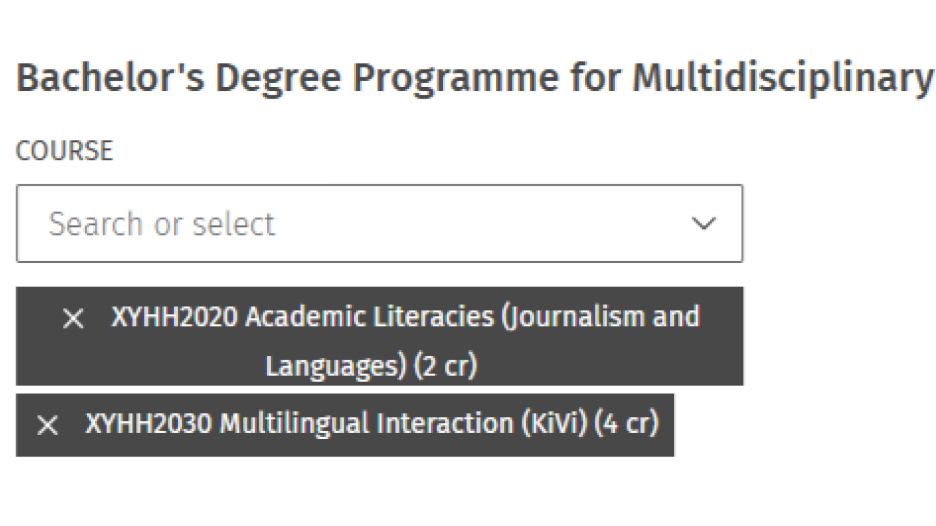
Changes made to the schedule must be saved in order for them to appear on the scheduling timeline.
2. Using timing templates
Using the scheduling courses with a timing template - feature allows you to follow a recommended timeline for completing your studies. Students can use this model as a basis for their own scheduling plan. However, the timing templates does not bind the student to a fixed timetable, instead, it helps to outline a recommended pace of study and progression toward graduation.
Note: Timing templates apply only to the common mandatory studies (example core competence studies). For complementary studies and specialization studies, students must create the schedule themselves.
If a timing template has been created for your degree programme, you can activate it by clicking the Schedule courses with a timing template -button at the top of the scheduling view. From the drop-down menu that opens, select the model schedule you want to use (students should choose the model schedule corresponding to their starting year). When you click Schedule, the system will schedule all courses that are included in your study plan and have a period-specific timing defined in the model schedule.
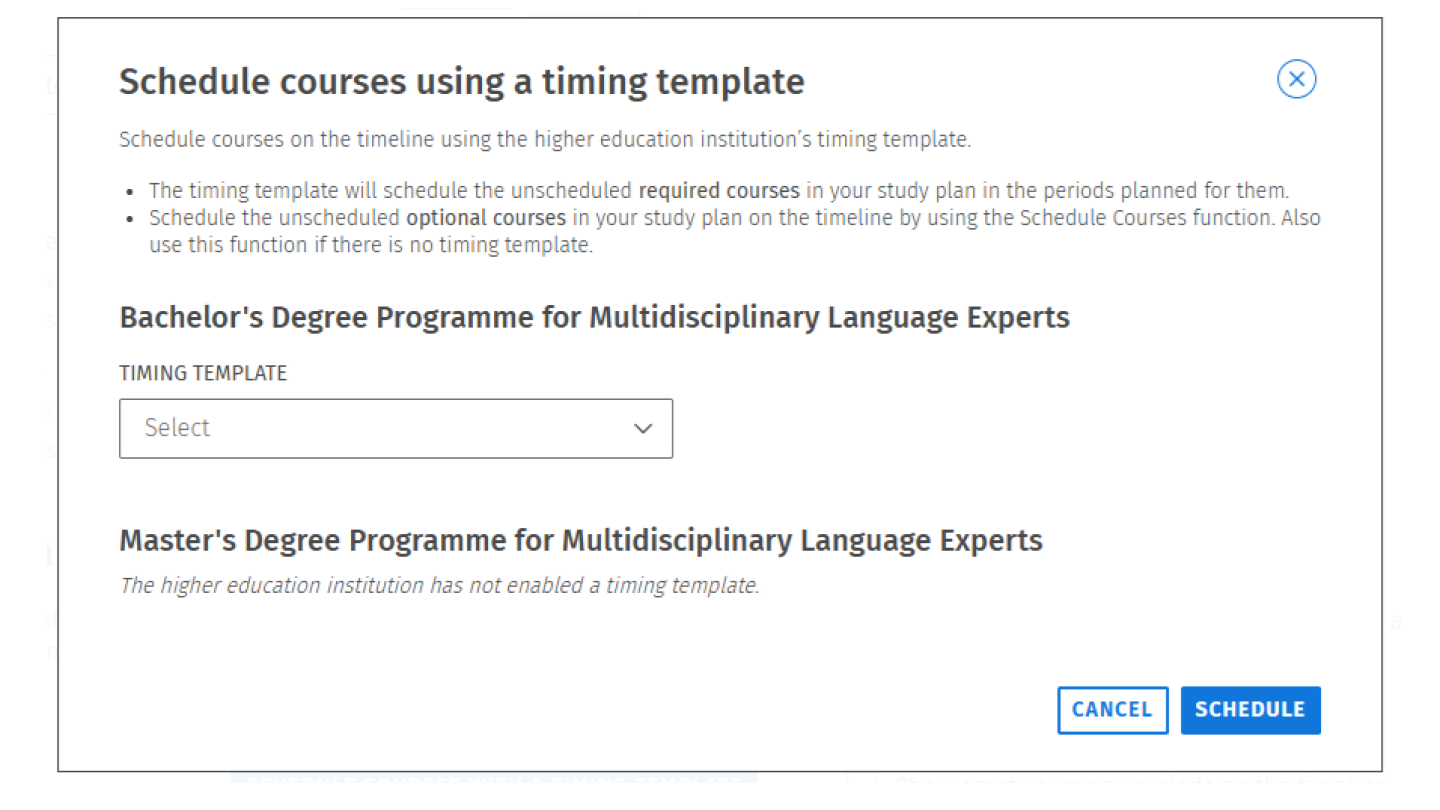
The Timing template places studies by period according to their level and progression (example: basic studies → language and communication studies → intermediate studies). Activating the Timing template does not remove any courses that have already been scheduled or completed.
Courses added through the model schedule can be managed in the same way as other scheduled courses—they can be moved or removed. Courses removed from the study plan are also removed from the schedule. New courses or modules are not automatically added to the schedule, but they can be included by reapplying the model schedule if a model schedule has been defined for them.
Removing schedules
The schedule of an individual course can be removed by selecting the courses you want to remove in the period view and then saving the changes. All schedules can be removed at once by selecting Remove all schedules.